Thursday 21 February 2013

WILLIAMS FW14B The story so far

REAR COWLING AND FRONT SUSPENSION

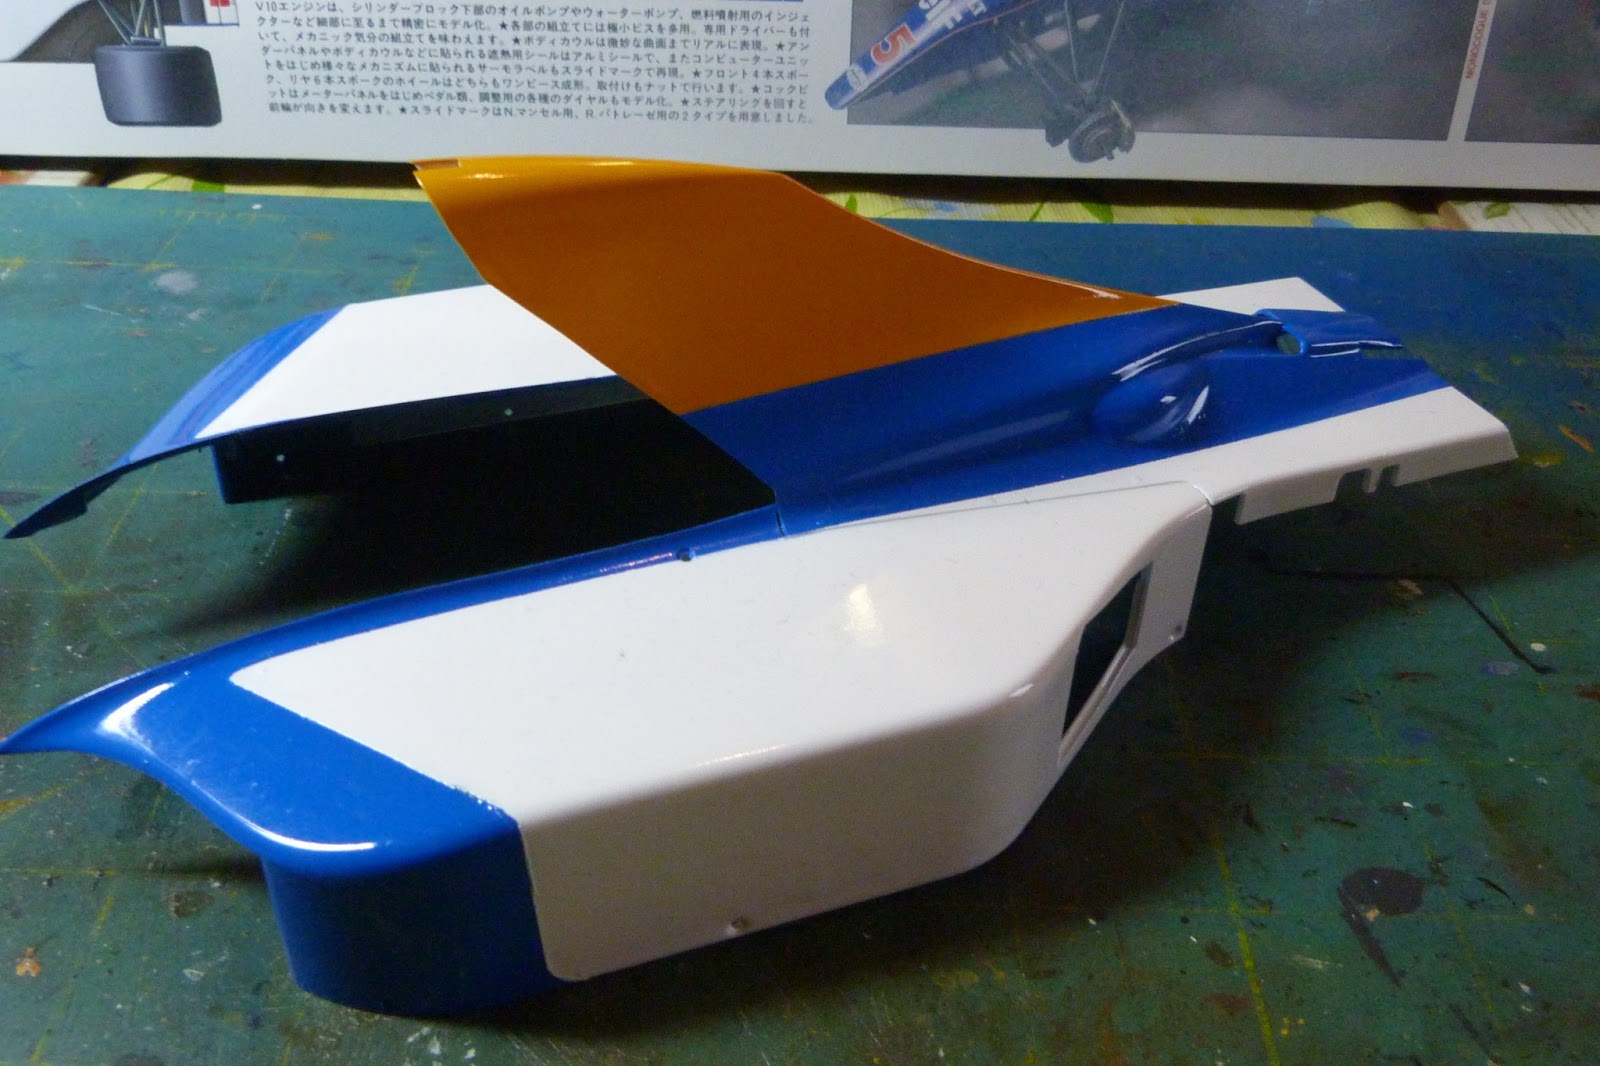
I have finally finished spraying the rear cowling and added the active suspension detailing. The rear cowling wasn't much of a problem until I took off the masking tape, which left one or two spots of matt adhesive marks on the blue area. My mistake I suppose, the blue paint must not have hardened off, even though it had been left for a week. I corrected this by over spraying with clear acrylic and that seems to have done the trick. The front active suspension detail is now complete. at least to the parts supplied, but the box art shows another section that should be included. However since this is now to be covered over for ever I think I will leave it and there seems to be little space under the cover to add extra components. The reason I say it will be covered over without being able to remove the cover is that the retaining screw is fixed into the plastic tub cover and removal of the screw will simply strip out the thread of the plastic making it impossible to fix it back down again. Another metal bracket would have resolved the problem and I am sure I could have rustled something up if I had thought of this sooner, what ho for hindsight eh! I have also been thinking about the engine air intake and having researched many photographs of the actual car, have decided to spray the blue square onto the yellow to avoid using the supplied blue decal and having paint match problems. Once again the side box art is incorrect in this aspect. I have also received from Hong Kong the extra Camel and tyre decals, well worth the $10 to finish the model accurately. I shall now get on with the front brakes and side pod detail and update my blog when I have made some progress. I know it might seem a bit of a pain, but I would really like anyone who reads this to give me some feedback. Thanks and cheerio for now. Here are some pics.


That's all folks !

Tuesday 12 February 2013

Williams FW14B update

Masking and Dust 
I thought That I had found my ideal solution to my masking problem by using my old bottle of Humbrol Maskol, from my paint store, coupled with my 5 mm tamiya masking tape for the small areas to be covered, jolly good and off we go. I started by spraying the yellow, them masking off after 24 hours drying time. This was when I encountered my dust problem, as gloss spray highlights dust much more obviously than matt spray, which in my previous experience is mainly the type of spray used on military models. Coupled with the fact that I am having to spray in  my kitchen rather than in the garage, it's just too cold even for us northern folk and the cold does nothing for paint drying time. Any way after a few coats I was happy with the finish. On with the masking and spraying the blue paint and more drying time. Disaster ! the maskol was not up for the job. Hey ho back to square one. This time I simply used the Tamiya tape and trimmed it with  a swann morton scalpel. What Ho ! success. I then repeated the process with the semi gloss black , job done. As I was busy with the masking tape I decided to spray the main body cowling and have so far sprayed the blue and yellow areas and am now in the process of spraying the white. Again dust is the main problem, as no matter how much I clean up the area to be sprayed, suddenly there seems to appear a small hair or tiny speck of dust, where do they come from ? I suppose I shouldn't be surprised, living in a house with a large boisterous Labrador  and backing onto farm fields doesn't help.
Anyway that was a good weeks spraying, including drying time and I have learnt a lot. I am also happy with the result and can only hope that the coach line decals fit well. I also need to purchase the extra Camel decals to make sure the finished model is accurate for the season.


I shall carry on with my project but have decided that there is no way that my modelling skills or my stock of tools and parts are up to the super detailing of Paul Smith's standards as I would have needed to cut off the nose section for the front bulkhead detail. You just have to realise your own limitations and marvel at the expertise of other people who are simply better than you.
Cheerio for now. 

Sunday 3 February 2013

WILLIAMS FW 14 B UPDATE

I have completed the cockpit tub and am now ready to cover it up in the front part of the body work, which will hide forever the foot pedals and most of the internal detail if the drivers compartment, so I thought I might as well take some photos and describe some of the problems I encountered.
I began  by spraying it blue, giving it 3 coats and allowing 12 hours between coats. I then masked of the blue and sprayed the semi gloss black areas. Having looked at the instructions for installation of  the engine I needn't have taken so much care with the back as it is covered with metal foil. Ah well, tinkity  tonk as they say. I proceeded to add the subsequent detail and was quite pleased with the result. The seat belts were a bit fiddly, making sure they were aligned properly with no overlapped areas. It is also important to remember not to fold the main body strap section before attaching it to the adjustment buckle, one of the very few ambiguous parts of Tamiya instructions. The straps themselves seem very prone to fraying and once attached to the seat need a careful eye to remove stray threads. Fitting the seat is also a little ambiguous and I referred to the box art for positioning. Once again much of the dashboard detail and the internal cockpit will be hidden when I attach the front cockpit cover. 
Here is my next problem. I need to spray this part yellow, blue and black. There are no clear instructions as to where to spray the blue paint on the underside of the front upper arm suspension covers and I cannot decide which colour to spray first. The instructions also do not indicate if the inside is sprayed black, but I assume it is. I shall now move on to completing the active suspension detail and the front brake assembly. 
I am enjoying making this model and in many ways I will be sad to complete it. I hope you enjoy the photos and if anyone out there has any advice please Email me at malcolmh61@googlemail.com


Also note here that there is no clearance between the steering shaft and the brake pedal.Having fixed the pedals earlier there wasn't much I could do here. The green cable attached to the pedals is also fixed with super glue. There is no way on earth that I can tie a knot in 10mm of cable, perhaps some superhuman at Tamiya can sent me a tutorial, because now I am trying to think of how I am going to tie it onto the throttle on the engine block. Hey ho another problem for another day.


This is the troublesome spray paint part that I mentioned.


I hope you enjoy the photos and at least I have some evidence of the detail inside the cockpit.


I had to include this photo of my biggest fans and the greatest contributors of problems to spray painting indoors in the winter months, HAIR !!